Bảo bối cấu hình Vigor 2WAN + VPN
I. Cấu hình 2 WAN — Bắt buộc làm trước
1. WAN 1 — PPPoE
Bước 1
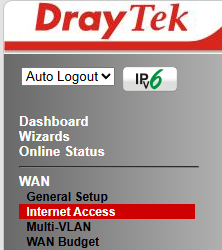
Nhấn WAN ở menu trái → chọn Internet Access.
Nhấn WAN ở menu trái → chọn Internet Access.
Bước 2
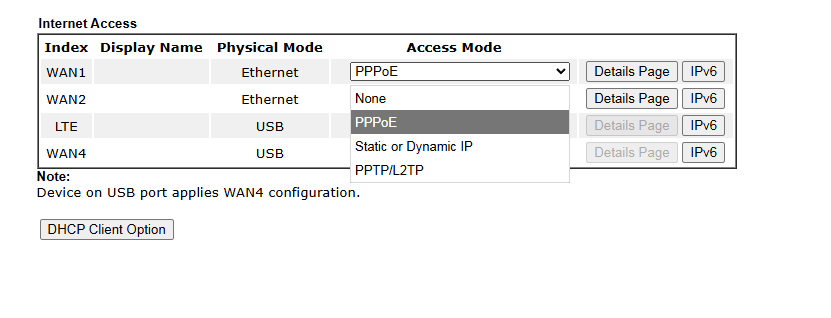
Tại hàng WAN 1, cột Access Mode → chọn PPPoE.
Tại hàng WAN 1, cột Access Mode → chọn PPPoE.
Bước 3
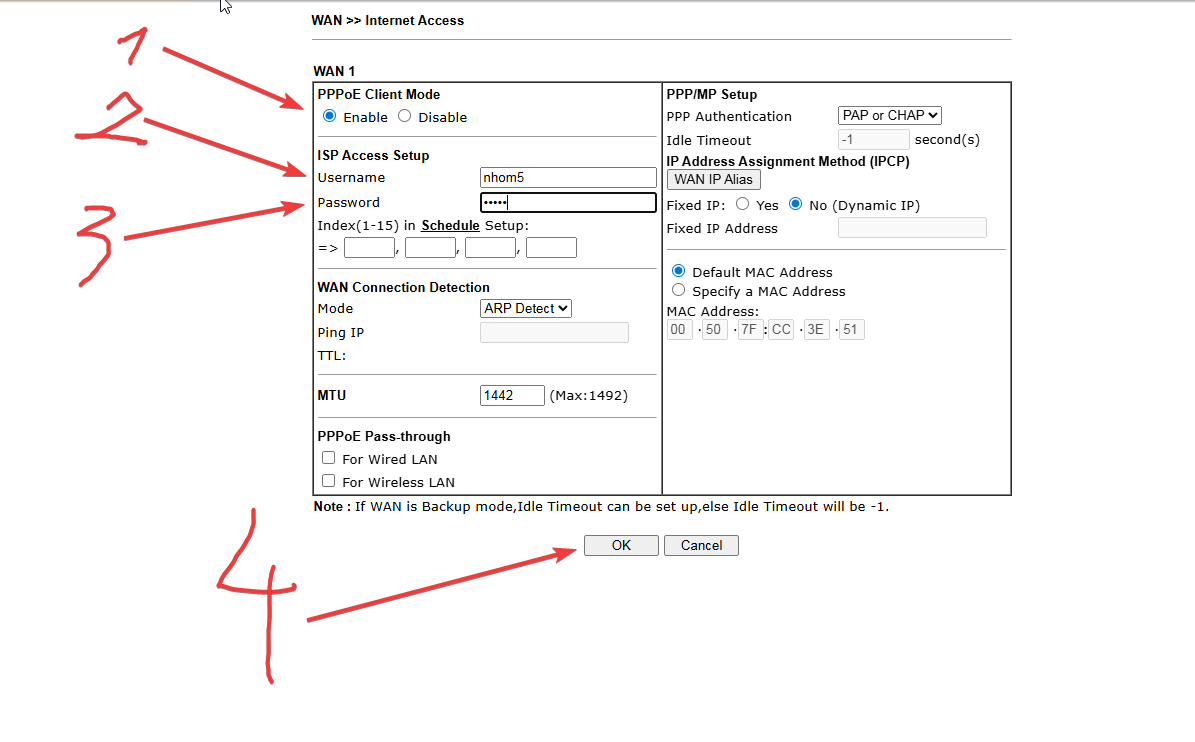
Nhấn Details Page tại WAN 1. Điền:
Nhấn Details Page tại WAN 1. Điền:
- PPPoE Client: Enable
- Username: nhom5 (nhom1 đến nhom6)
- Password: nhom5 (giống Username)
⚠️ Chờ router tự khởi động lại (reset) xong mới làm WAN 2!
2. WAN 2 — IP tĩnh
Bước 4
Đăng nhập lại router → vào WAN → Internet Access.
Đăng nhập lại router → vào WAN → Internet Access.
Bước 5
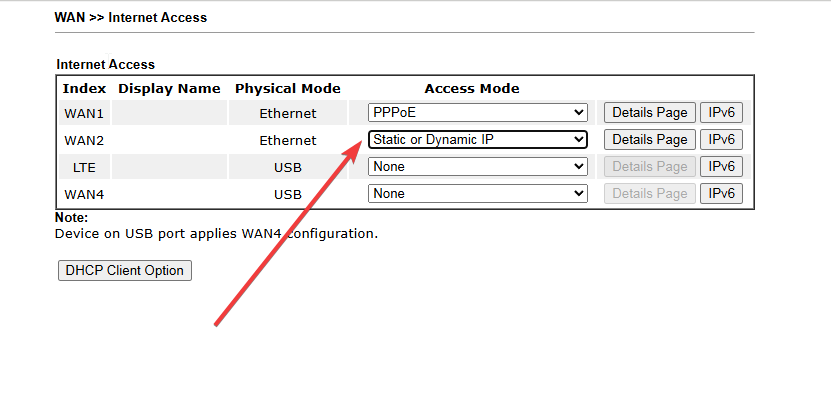
Tại hàng WAN 2, cột Access Mode → chọn Static or Dynamic IP.
Tại hàng WAN 2, cột Access Mode → chọn Static or Dynamic IP.
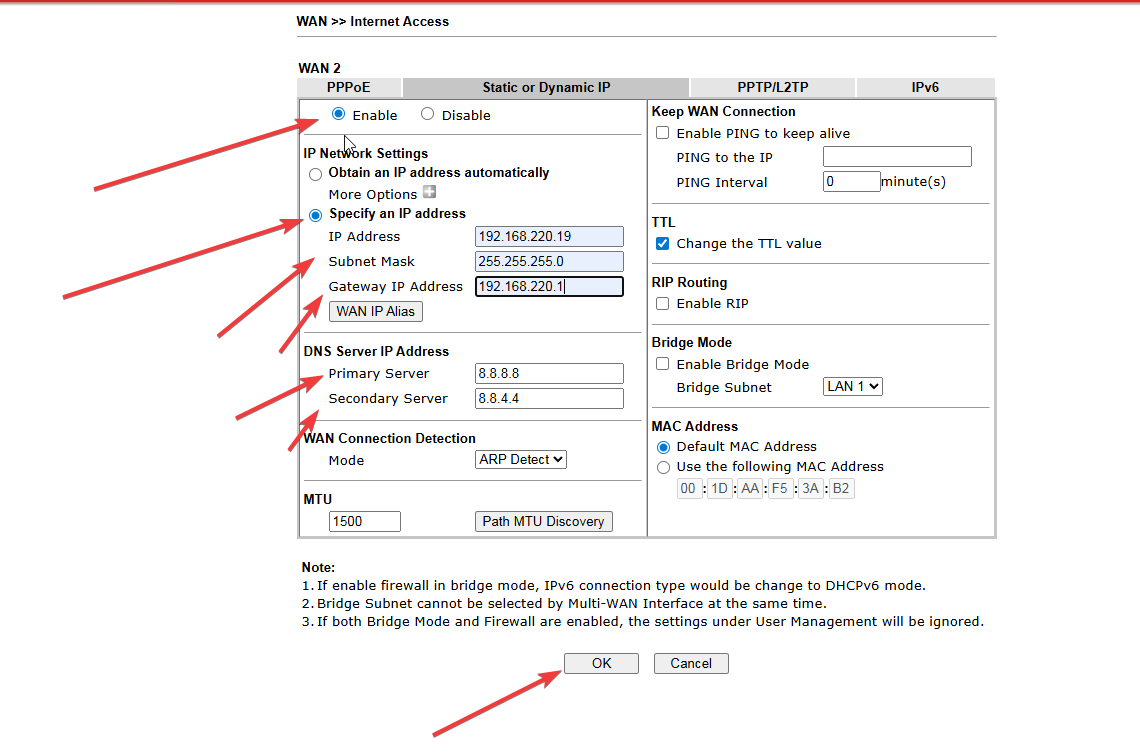
Bước 6
Nhấn Details Page tại WAN 2. Chọn Enable + Specify an IP address. Điền:
Nhấn Details Page tại WAN 2. Chọn Enable + Specify an IP address. Điền:
- IP Address: 192.168.220.12 (đuôi pick 11–200)
- Subnet Mask: 255.255.255.0
- Gateway IP: 192.168.220.1
- Primary DNS: 8.8.8.8
- Secondary DNS: 8.8.4.4
II. Trường hợp 1 — Bạn làm Server (Site A)

Bước 7 — Bài 6 (Host to LAN)
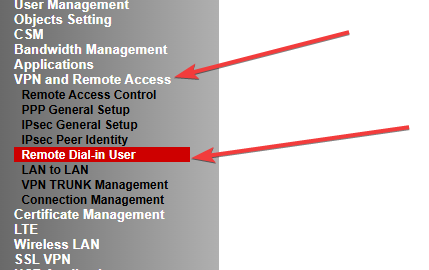
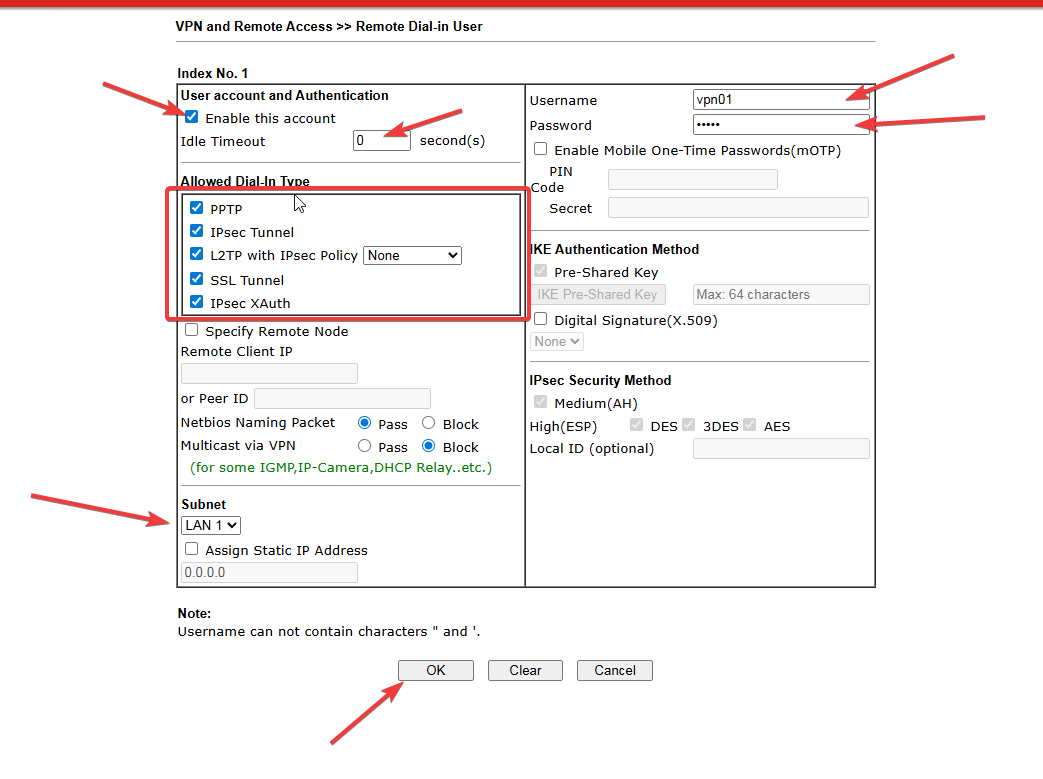
Vào VPN and Remote Access → Remote Dial-in User → Index 1:
Vào VPN and Remote Access → Remote Dial-in User → Index 1:
- Tích Enable this account
- Idle Timeout: 0
- Allowed Dial-In Type: tích PPTP, IPsec Tunnel, L2TP with IPsec Policy, SSL Tunnel
- Username: vpn01
- Password: vpn01
- Subnet: LAN 1
Bước 8 — Bài 7 (LAN to LAN): Cấu hình IPsec Key
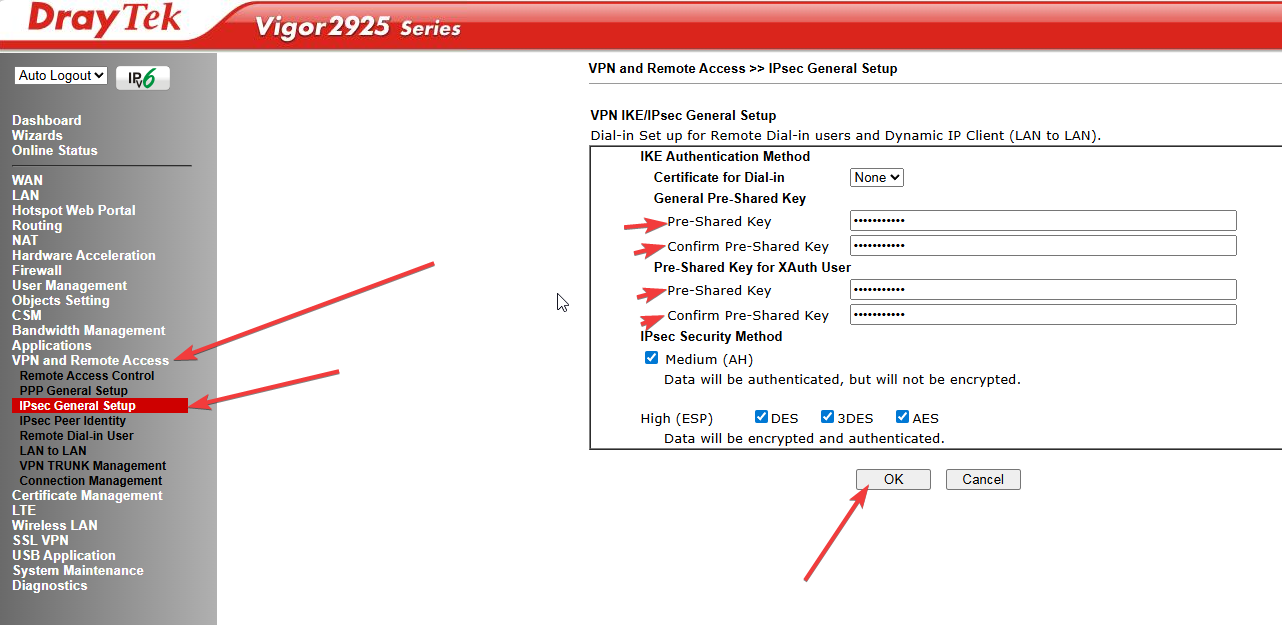
Vào VPN and Remote Access → IPsec General Setup:
Vào VPN and Remote Access → IPsec General Setup:
- Pre-Shared Key: 12345678abc
- Confirm Pre-Shared Key: 12345678abc
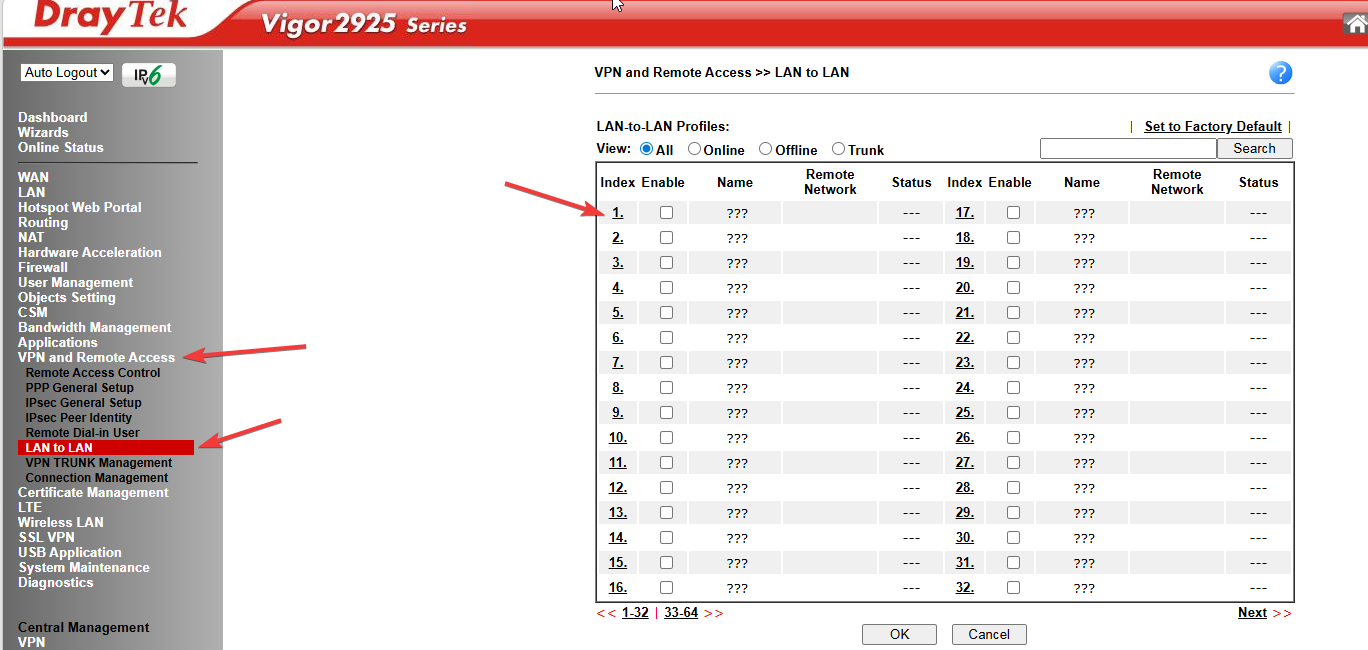

Bước 9 — Bài 7 (LAN to LAN): Dial-in
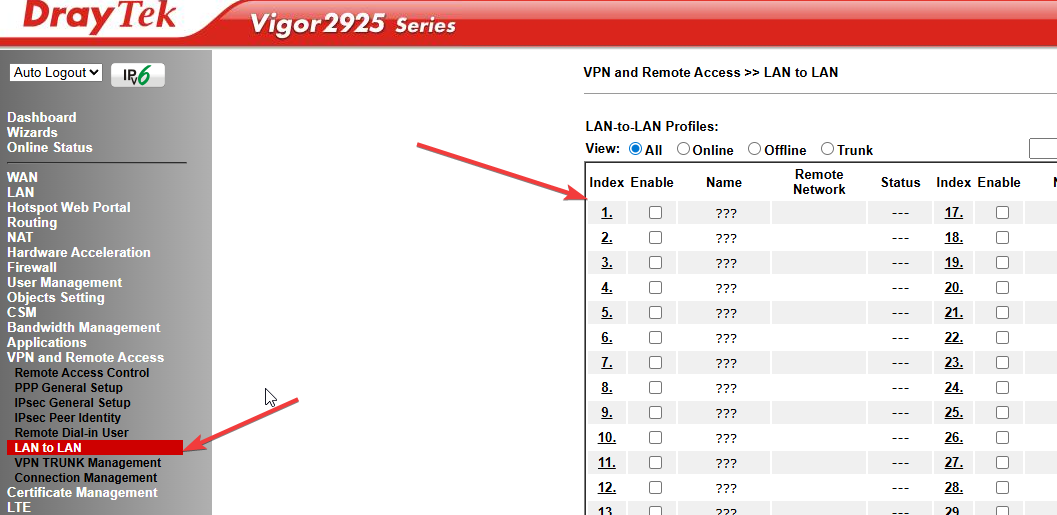
Vào VPN and Remote Access → LAN to LAN → Index 1:
Vào VPN and Remote Access → LAN to LAN → Index 1:
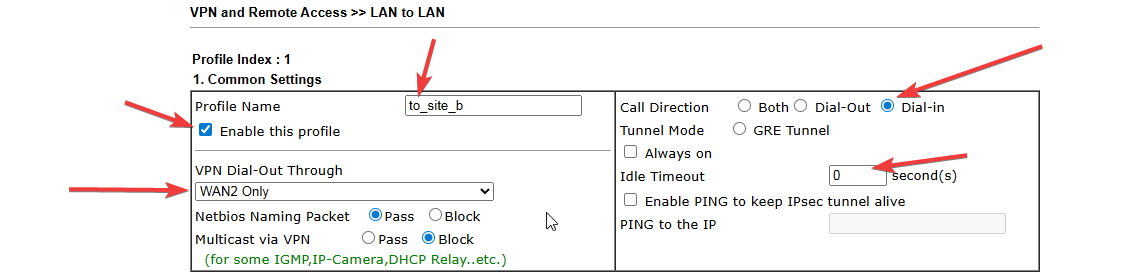
- Mục 1:
- Profile Name: to_site_b
- Tích Enable this profile
- Call Direction: Dial-in
- Idle Timeout: 0
- VPN Dial-Out Through: WAN 2 Only
- Mục 3:
- Tích IPsec Tunnel
- Tích Pre-Shared Key
- IPsec Security Method: Medium(AH)
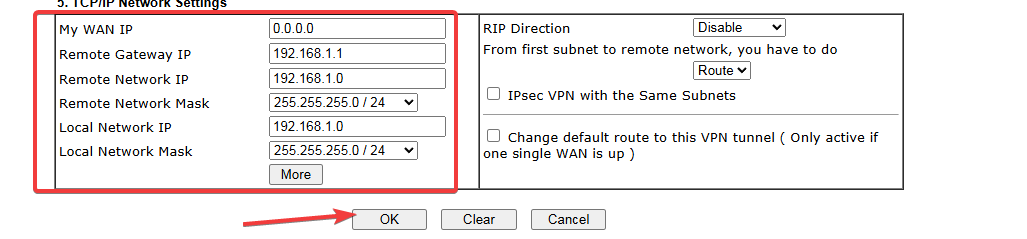
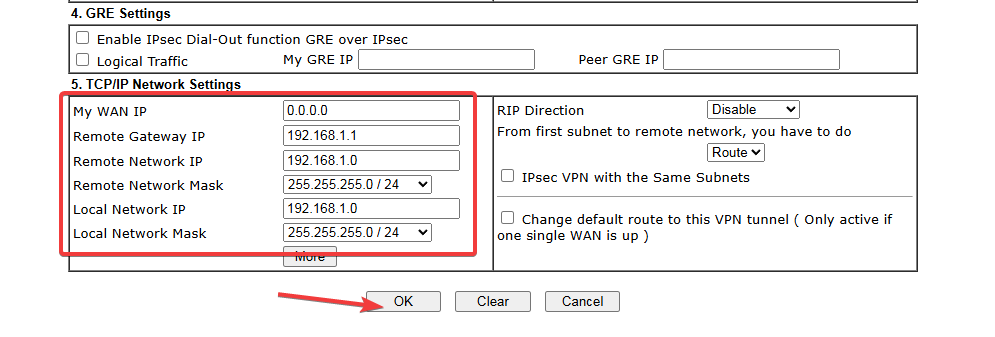
- Mục 5:
- Remote Network IP: 192.168.1.0 / Mask: 255.255.255.0
- Local Network IP: 192.168.1.0 / Mask: 255.255.255.0
III. Trường hợp 2 — Bạn làm Client (Site B)
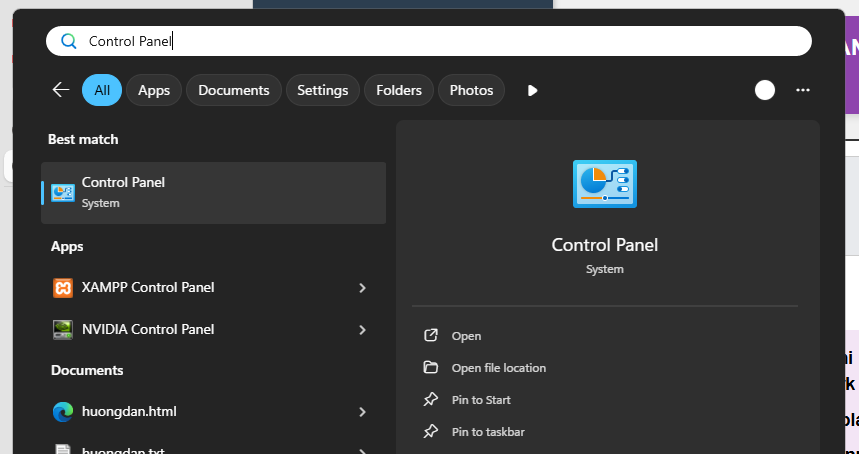
Bước 10 — Bài 6 (Host to LAN): Cấu hình VPN trên Windows
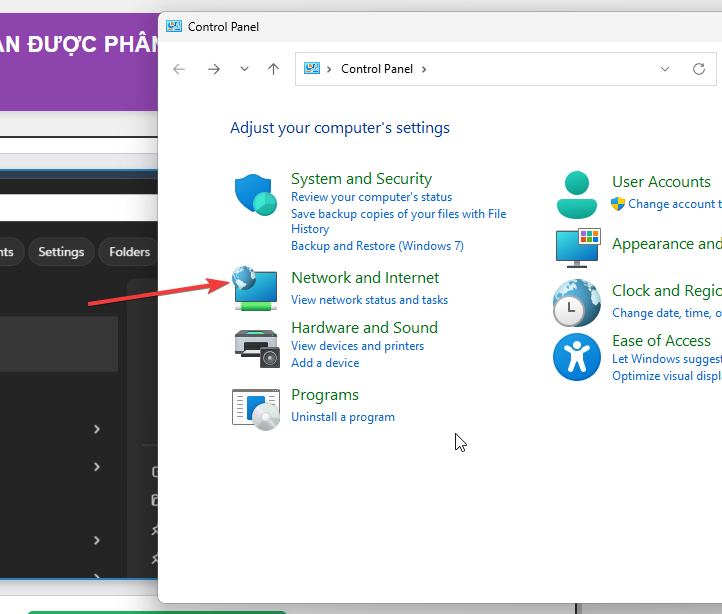
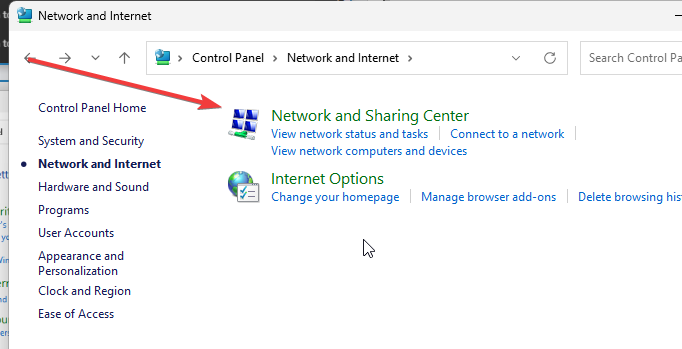
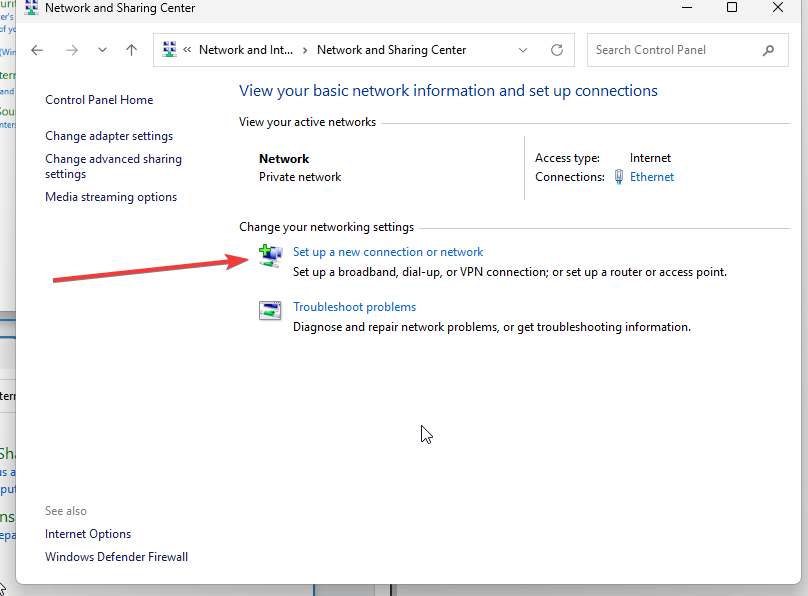
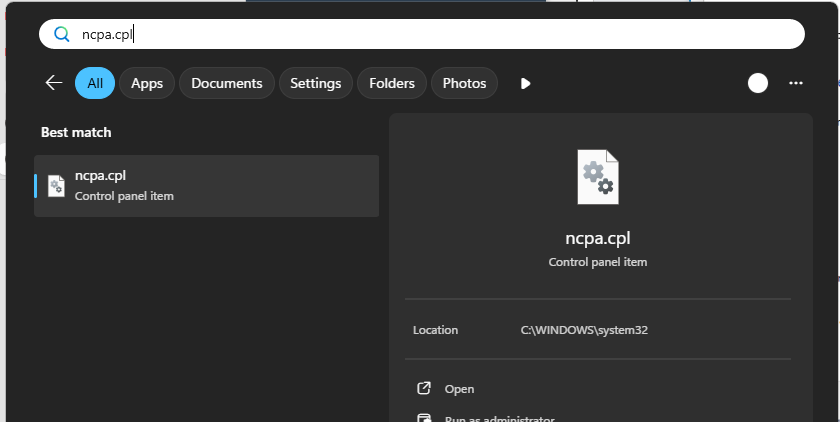
Mở Control Panel → Network and Sharing Center → Set up a new connection or network:
Mở Control Panel → Network and Sharing Center → Set up a new connection or network:
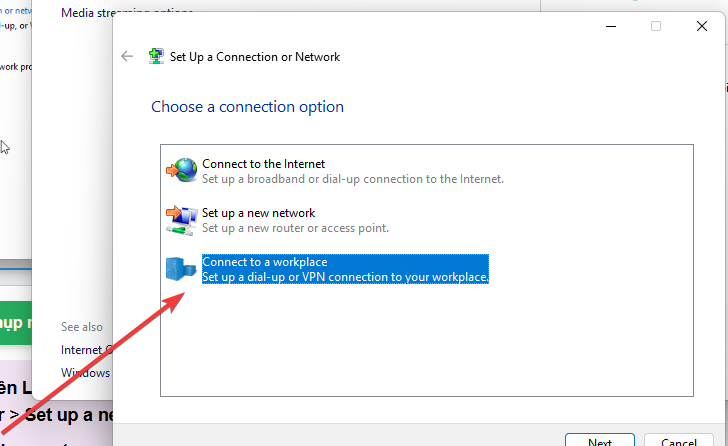
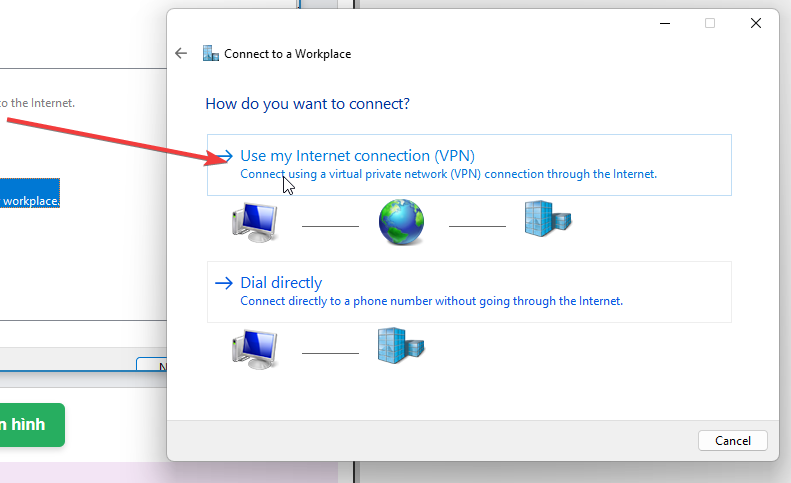
- Chọn Connect to a workplace → Next
- Chọn No, create a new connection → Next
- Chọn Use my Internet connection (VPN)
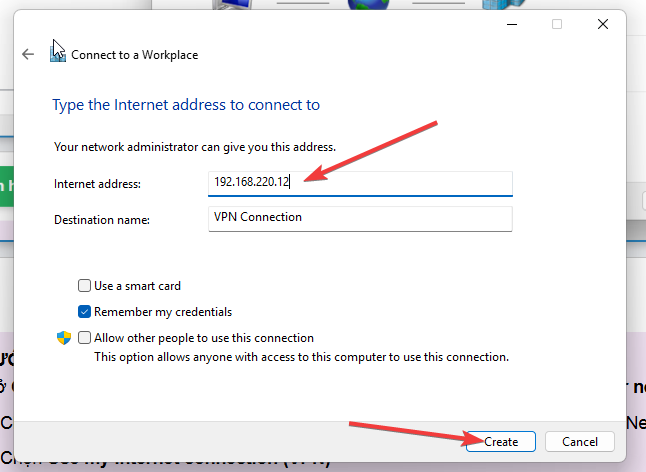
- Internet address: 192.168.220.12 (IP WAN 2 của Server)
- Destination name: VPN Connection
- Tích Don't connect now; just set it up so I can connect later → Next
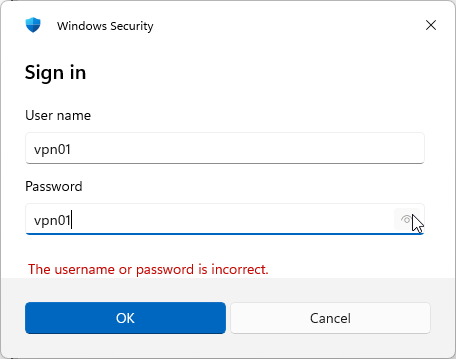
- User name: vpn01
- Password: vpn01
- → Nhấn Create → Close
Bước 11 — Bài 6: Cài Security + Test kết nối
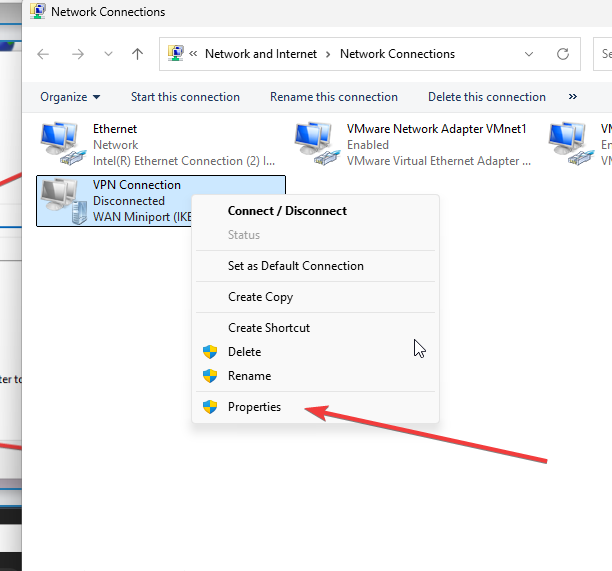
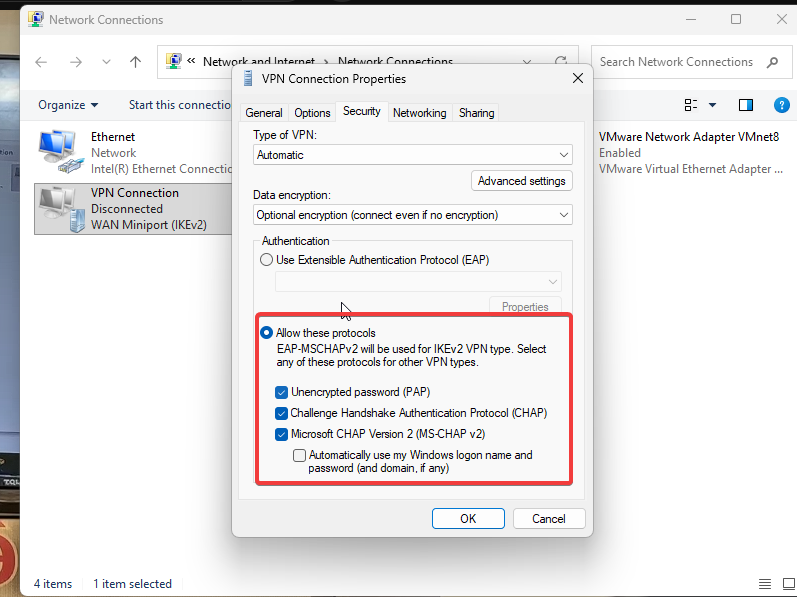
Click phải VPN Connection → Properties → tab Security:
Click phải VPN Connection → Properties → tab Security:
- Data encryption: Optional encryption (connect even if no encryption)
- Allow these protocols: tích PAP, CHAP, MS-CHAP v2 → OK
- Nhấn Connect, nhập user/pass vpn01
- Mở cmd, gõ: ping 192.168.11.x ( x phải check ) -t
Bước 12 — Bài 7 (LAN to LAN): Dial-out trên Router
Vào VPN and Remote Access → LAN to LAN → Index 1:
Vào VPN and Remote Access → LAN to LAN → Index 1:
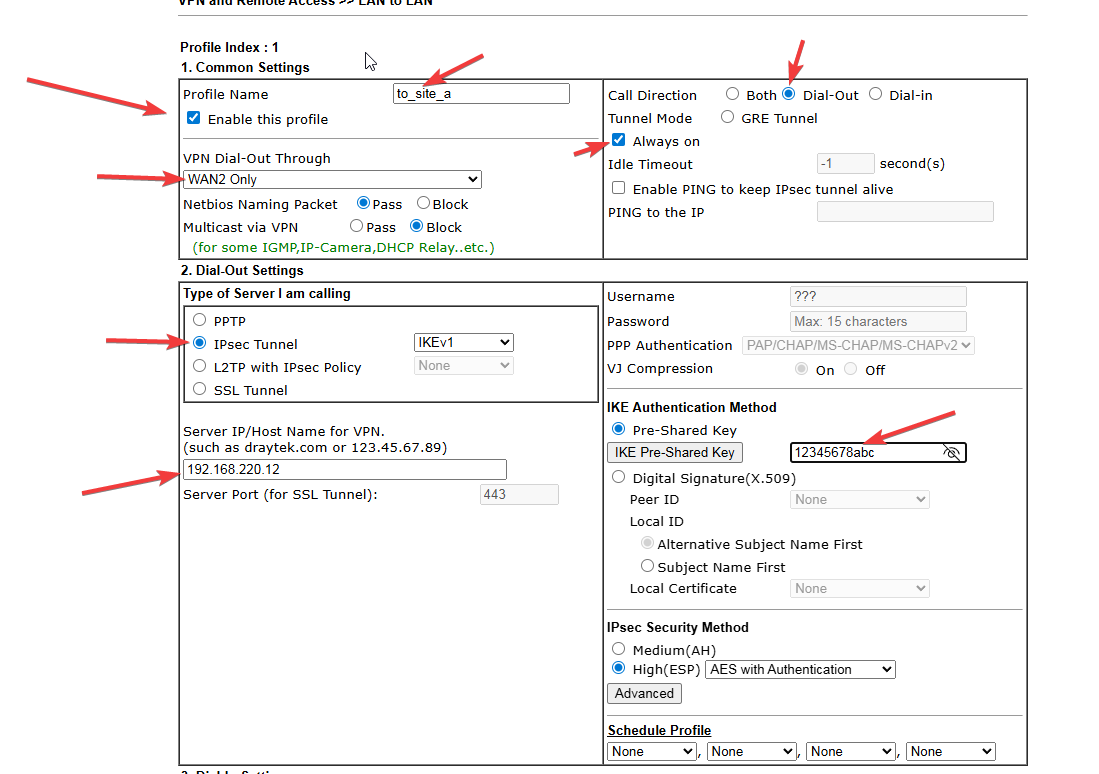
- Mục 1:
- Profile Name: to_site_a
- Tích Enable this profile
- Call Direction: Dial-out
- Tích Always on
- Mục 2:
- Tích IPsec Tunnel
- Server IP: 192.168.220.12
- Pre-Shared Key: 12345678abc
- IPsec Method: High(ESP)
- Mục 5:
- Remote Network IP: 192.168.1.0 / Mask: 255.255.255.0
- Local Network IP: 192.168.1.0 / Mask: 255.255.255.0